Testing
Testing is essential to the process of creating software. “If it isn’t tested, it doesn’t work” is a good rule of thumb.
For some specific advice for adding new tests in the IDAES code, see IDAES Contributor Guide.
There are different kinds of tests: functional, acceptance, performance, usability. We will primarily concern ourselves with functional testing here, i.e. whether the thing being tested produces correct outputs for expected inputs, and gracefully handles everything else. Within functional testing, we can classify the testing according to the axes of time, i.e. how long the test takes to run, and scope, i.e. the amount of the total functionality being tested. Along these two axes we will pick out just two points, as depicted in Figure 1. The main tests you will write are “unit tests”, which run very quickly and test a focused amount of functionality. But sometimes you need something more involved (e.g. running solvers, using data on disk), and here we will label that kind of test “integration tests”.
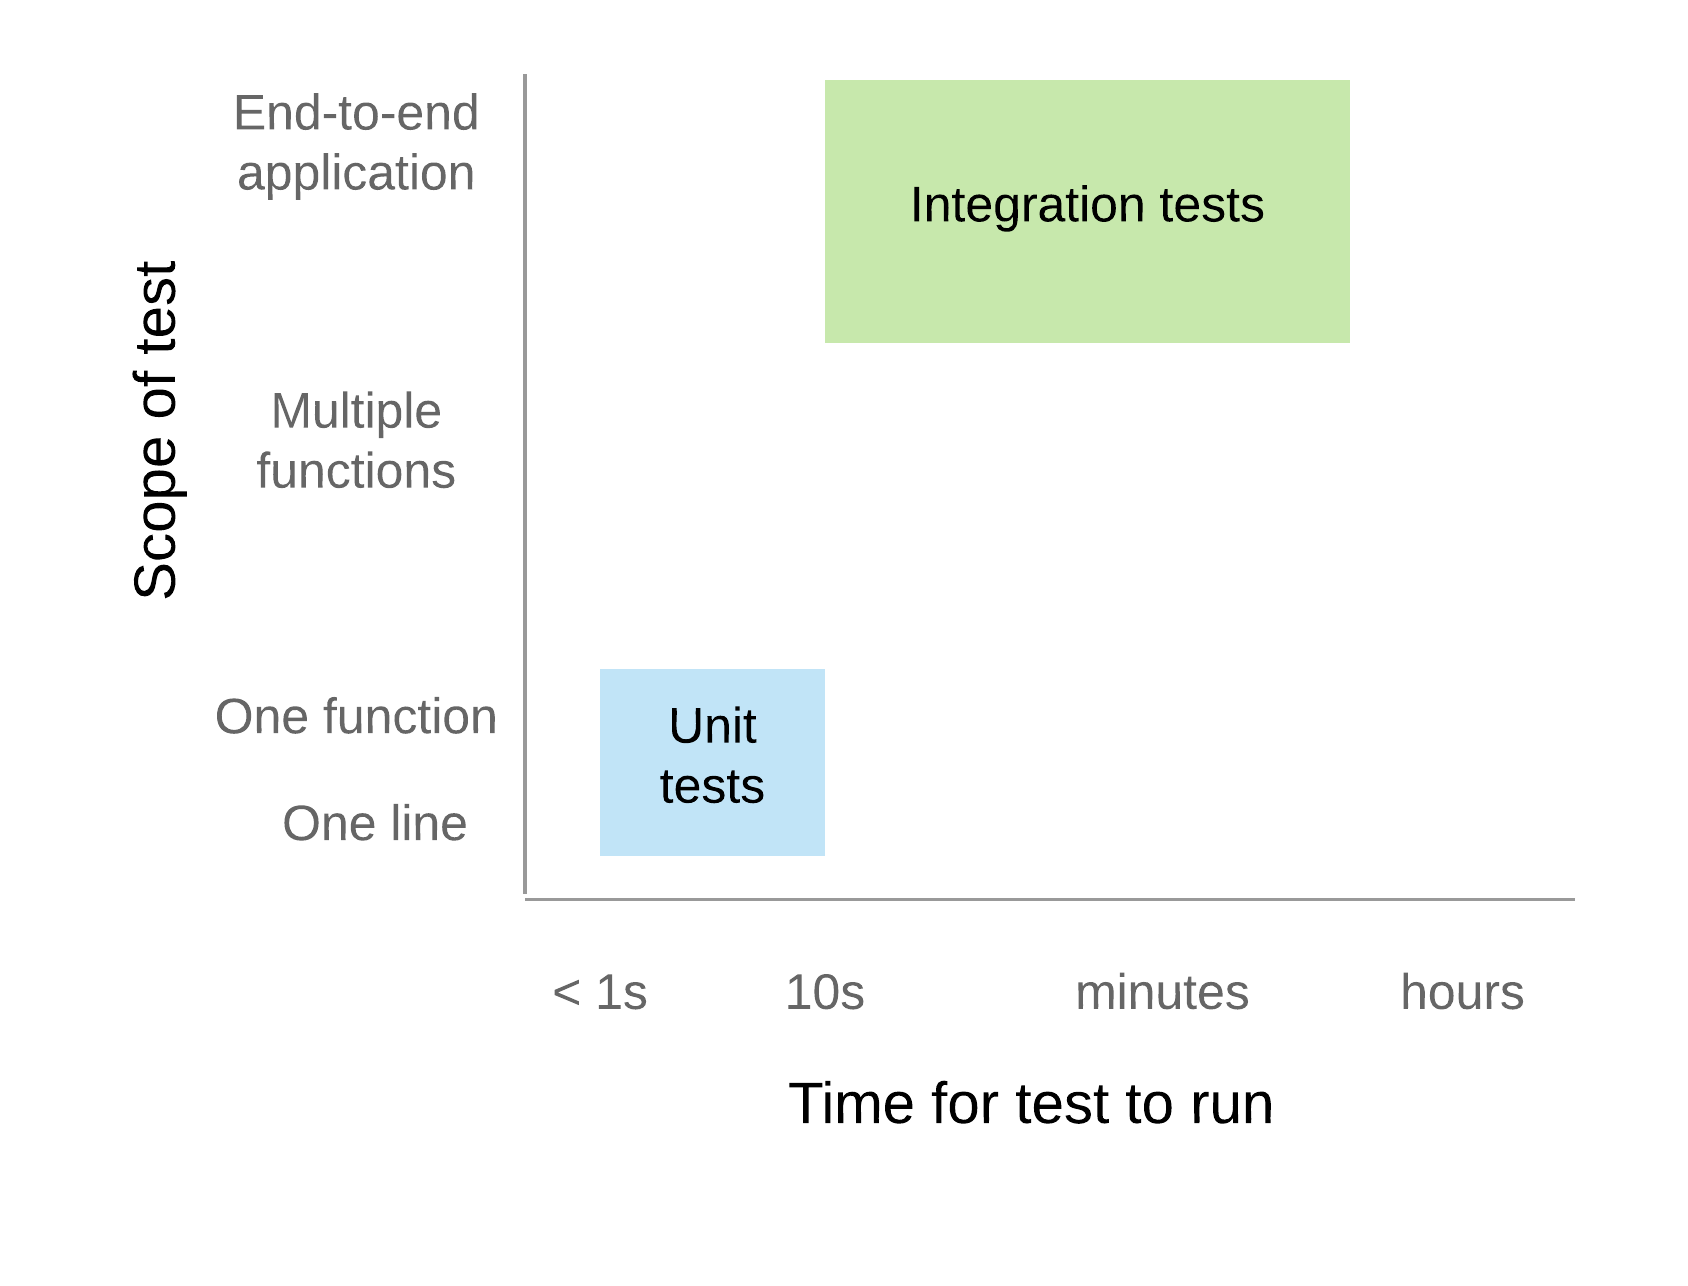
Figure 1. Conceptual space of functional testing
Unit tests
Testing individual pieces of functionality, including the ability to report the correct kind of errors from bad inputs. Unit tests must always run quickly. If it takes more than 10 seconds, it is not a unit test, and it is expected that most unit tests take well under 1 second. The reason for this is that the entire unit test suite is run on every change in a Pull Request, and should also be run relatively frequently on local developer machines. If this suite of hundreds of tests takes more than a couple of minutes to run, it will introduce a significant bottleneck in the development workflow.
For Python code, we use the pytest testing framework. This is compatible with the built-in Python unittest framework, but has many nice features that make it easier and more powerful.
The best way to learn how to use pytest is to look at existing unit tests, e.g. the file “idaes/core/tests/test_process_block.py”. Test files are found in a directory named “test/” in every Python package (directory with an “__init__.py”). The tests are named “test_{something}.py”; this naming convention is important so pytest can automatically find all the tests.
When writing your own tests, make sure to remember to keep each test focused on a single piece of functionality. If a unit test fails, it should be obvious which code is causing the problem.
Tagging tests
Since we use pytest for our testing, we have access to the very nice pytest “tag” feature, which uses Python decorators to add labels to tests.
An example of a test with a tag is (assume import pytest at the top of every test module):
@pytest.mark.unit
def test_something():
    assert 2. + 2. == 4.
Every test should be decorated with @pytest.mark.<level> where <level> has one of three values:
- unit
Test runs quickly (under 2 seconds) and has no network/system dependencies. Uses only libraries installed by default with the software
- component
Test may run more slowly (under 10 seconds, or so), e.g. it may run a solver or create a bunch of files. Like unit tests, it still shouldn’t depend on special libraries or dependencies.
- integration
Test may take a long time to run, and may have complex dependencies.
The expectation is that unit tests should be run by developers rather frequently, component tests should be run by the continuous integration system before running code, and integration tests are run across the codebase regularly, but infrequently (e.g. daily).
Sometimes you may also want to run tests on only a particular platform. We currently support Windows,
Linux, and (to a lesser extent) MacOS. To restrict a test to one or more of these platforms, typically
Linux-only, use @pytest.mark.<platform>, or @pytest.mark.no<platform>
where <platform> has one of three values:
- linux / nolinux
Linux systems, regardless of distribution, e.g. CentOS, Ubuntu, Debian, et al.
- win32 / nowin32
Windows 10
- darwin / nodarwin
Mac OSX
As you may have guessed, the “no<platform>” version means that any operating system except “<platform>” will run the test. You can combine these tags as you wish, though until we have more than three options it is not necessary.
Here are a few examples:
@pytest.mark.unit
def test_something():
    print("unit test, all platforms")

@pytest.mark.unit
@pytest.mark.nowin32
def test_something():
    print("unit test, all platforms except Windows")

@pytest.mark.component
@pytest.mark.linux
def test_something():
    print("component test, linux-only")

@pytest.mark.integration
@pytest.mark.nodarwin
def test_something():
    print("integration test, all platforms except MacOS")
Mocking
Mocking is a common, but important, technique for avoiding dependencies that make your tests
slow, fragile, and harder to understand. The basic idea is to
replace dependencies with fake, or “mock”, versions of them that will provide just
enough realism for the test. Python provides a library, unittest.mock,
to help with this process by providing objects that can report how they were used,
and easily pretend to have certain functionality (returning, for example, fixed values).
To make this all more concrete, consider a simple problem where you want to test
a function that makes a system call (in this case, os.remove):
# file: mymodule.py
import os
def rm(filename):
    os.remove(filename)
Normally, to test this you would create a temporary file, and then see if it got removed. However, with mocking you can take a different approach entirely:
# file: test_mymodule.py
from mymodule import rm
from unittest import mock

@mock.patch('mymodule.os')
def test_rm(mock_os):
    rm("any path")
    # test that rm called os.remove with the right parameters
    mock_os.remove.assert_called_with("any path")
Here, we have “patched” the os module that got imported into “mymodule” (note: had
to do mymodule.os instead of simply os, or the one mymodule uses would not get patched)
so that when rm calls os.remove, it is really calling a fake method in mock_os
that does nothing but record how it was called. The patched module is passed in to
the test as an argument so you can examine it. So, now, you are not doing any OS
operations at all! You can imagine how this is very useful with large files or
external services.
Integration tests
Integration tests exercise an end-to-end slice of the overall functionality. At this time, the integration tests are all housed in Jupyter Notebooks, which serve double-duty as examples and tutorials for end users. We execute these notebooks and verify that they run correctly to completion at least once before each new release of the software.
Code coverage
The “coverage” of the code refers to what percentage of the code (“lines covered” divided by total lines) is executed by the automated tests. This is important because passing automated tests is only meaningful if the automated tests cover the majority of the code’s behavior. This is not a perfect measure, of course, since simply executing a line of code under one condition does not mean it would execute correctly under all conditions. The code coverage is evaluated locally and then integrated with Github through a tool called Coveralls.